
Layers in Eduard
Add, delete, duplicate and order layers
Add a layer with Shading > Add Layer or click the plus button in the top-right corner of a document window.
To delete a layer do one of the following:
Select a layer and click the bin button.
Select a layer and press the delete key.
Right-click on a layer and choose Delete Layer.
Duplicate a layer with Shading > Duplicate Layer, or right-click on a layer and choose Duplicate Layer.
To change the order of layers, click and drag a layer in the list, or use the to two arrow buttons to move the selected layer.
Show and hide layers
Show or hide layers by clicking on the eye icon. If a layer is hidden by a fully opaque layer above it, the eye icon includes a small warning symbol and an additional warning icon where you adjust layer settings.
Hint : Click on an eye icon and drag the mouse pointer over the eye icons of other layers to quickly show or hide multiple layers.
Layer name
Double-click a layer name to change it, or right-click on a layer and choose Change Layer Name.
Layer blending and opacity
Layer blending combines layers starting with the bottom-most layer and ending with the top-most layer. Click on the half-filled circle icon to adjust the blend mode and opacity of a layer.
Layer mask
Locally vary the effect of a layer with a mask.
Curve
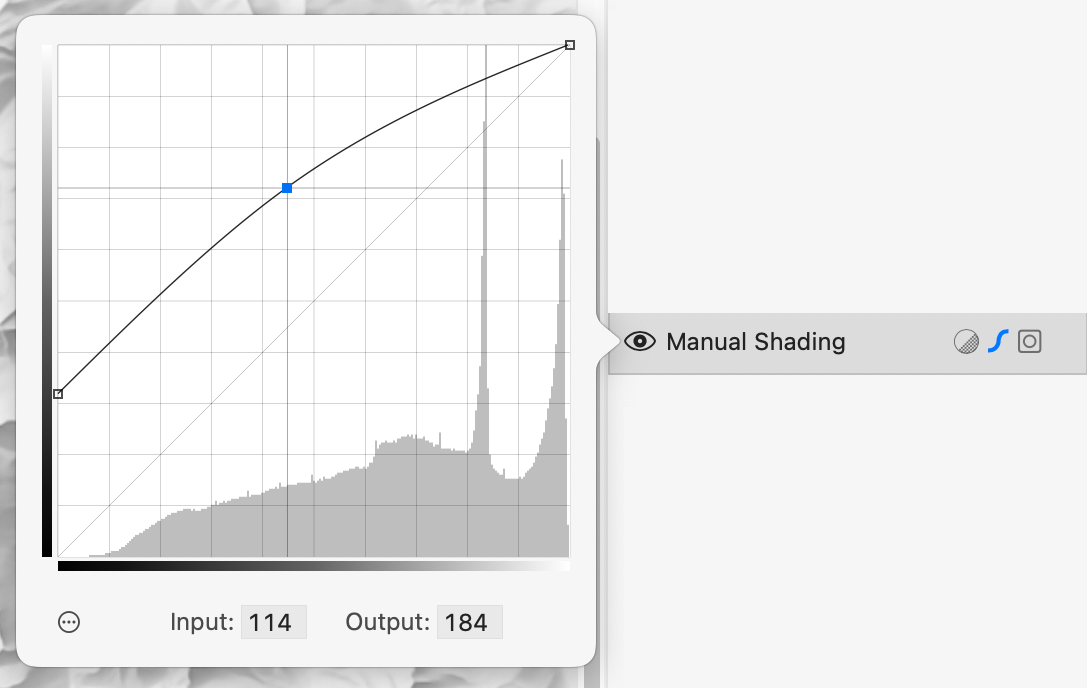
Adjust the curve for controlling brightness and contrast of a layer. Click on the s-shaped icon, then add, remove and move curve points. The curve only affects the image created by a layer. To adjust multiple layers, add a curve layer .
Add a point by clicking near the curve.
Move a point by dragging it, or click the point and type input and output values for the point. Dragging a point upwards increases the brightness, and vice versa.
Hint : On macOS 14 and later, press the arrow keys to move the selected blue point. Press the shift key for fast movement. Press the tab key to select the next point, and press the shift and tab keys to select the preceding point.
To delete a point, do one of the following:
Drag the point outside the curve area and release the mouse pointer.
Select a point, then press the delete key. This requires macOS 14.
Select a point, then right-click and choose Delete Selected Point.
Select a point, then choose Delete Selected Point in the menu under the button with three dots in the lower-left corner.
Reset the curve by right-clicking and choosing Reset Curve. The Reset Curve command is also available in the menu shown when clicking on the button with three dots in the lower-left corner.
The histogram shows the distribution of the gray values of the image created by the layer.
Save or load a curve with the button showing three dots in the lower-left corner. Eduard supports the ACV file format for exchanging curves with Adobe Photoshop and other apps.
Hint : When the pointer is over the shaded image, the value of the position at the pointer location is indicated by a circle on the curve.
See also
Shading layers
Adjustment layers
![]()